Refinishing antique wood furniture is a way to honor craftsmanship built to last. Whether it is a worn mahogany sideboard or a faded walnut armoire, a well-executed refinishing process reveals the character beneath the wear.
Imagine showcasing a cabinet that once stood in your grandmother’s home, the one with the tiny drawer that always held ribbons or handwritten notes. When you choose to refinish it, you are making a sustainable decision and keeping those memories close.
In this guide, House of Chippendale will walk you through a careful, step-by-step approach to refinishing wood furniture, crafted for homeowners and collectors alike. Let us begin with the fundamentals first.
What Is Refinishing Antique Wood Furniture?
Refinishing antique wood furniture is a delicate balance between preservation and renewal. Refinishing involves removing the old finish, treating the raw wood carefully, and applying a new protective layer that revives its natural beauty. However, it is essential to note that refinishing wood furniture is not the same as restoring or repairing.
-
Restoration focuses on bringing a piece back to its original state, often preserving patina and imperfections that tell a story.
-
Repair, on the other hand, addresses structural issues, like fixing loose joints or replacing missing parts. Meanwhile, refinishing walks a fine line between these approaches.
Overdoing a refinish can sometimes strip away more than just old varnish; it can affect the piece's historical or market value.
That is why each decision should be guided by aesthetic sensibility and respect for the piece’s original integrity, from the choice of materials to the method used.
Related Content to Read: What Is Furniture Restoration and How Does It Work?
Step-by-Step Guide to Refinishing Antique Wood Furniture

Step 1: Prepare Your Workspace and Gather Supplies
Refinishing antique wood furniture always begins with the right setting. Choose a clean, well-ventilated area, preferably where natural light can help you inspect details as you go. It requires patience and precision, so you want space to move around comfortably.
Before touching the piece, gather everything you will need:
-
A dust mask
-
Gloves
-
Soft cloths
-
Varying grits of sandpaper
-
A chemical stripper (if required)
-
Brushes
-
Wood finish or stain
-
Protective wax
Having the right tools within reach helps you work more fluidly.
Step 2: Clean the Furniture Thoroughly
Before you even think about sanding or stripping, gently clean the piece. Over the years, old furniture tends to collect layers of wax, polish, and who knows what things that dull the finish and mask the wood’s true character.
So, start with a soft cloth, warm water, and a drop or two of mild dish soap.
Pay extra attention to any carvings or moldings. There are little corners where dust loves to hide. A soft brush or even a paintbrush can help you reach the nooks.
Here is the satisfying part: As the grime lifts, you will start to see the grain peek through again. That is when you know you are on the right track.
Step 3: Strip Old Finish Carefully
If cleaning is insufficient and the original finish is badly worn, it might be time to strip it away. This part can feel intimidating, but it does not have to be.
Choose a good-quality furniture stripper, apply it with a brush, and give it time to work. Then gently scrape it off using a plastic scraper or steel wool.
Quick reminder!
Wear gloves, maybe even goggles, and ensure you work in a well-ventilated area. The chemicals can be strong, so caution goes a long way. When you are done, dispose of the old finish and rags properly.
Discover our signature finishes to bring your vision to real life.
Step 4: Sand the Surface Smooth

Now comes the oddly therapeutic part: Sanding.
Refinishing antique wood furniture is similar to scrubbing away its past. It just softens the rough edges so the story shines through again.
Start with a medium grit to even things out, then move to finer grits for that silky finish. Always sand with the grain, never across it, and take extra care around edges or any veneer. If your piece has delicate detailing, use a sanding sponge or fingers to keep those features intact.
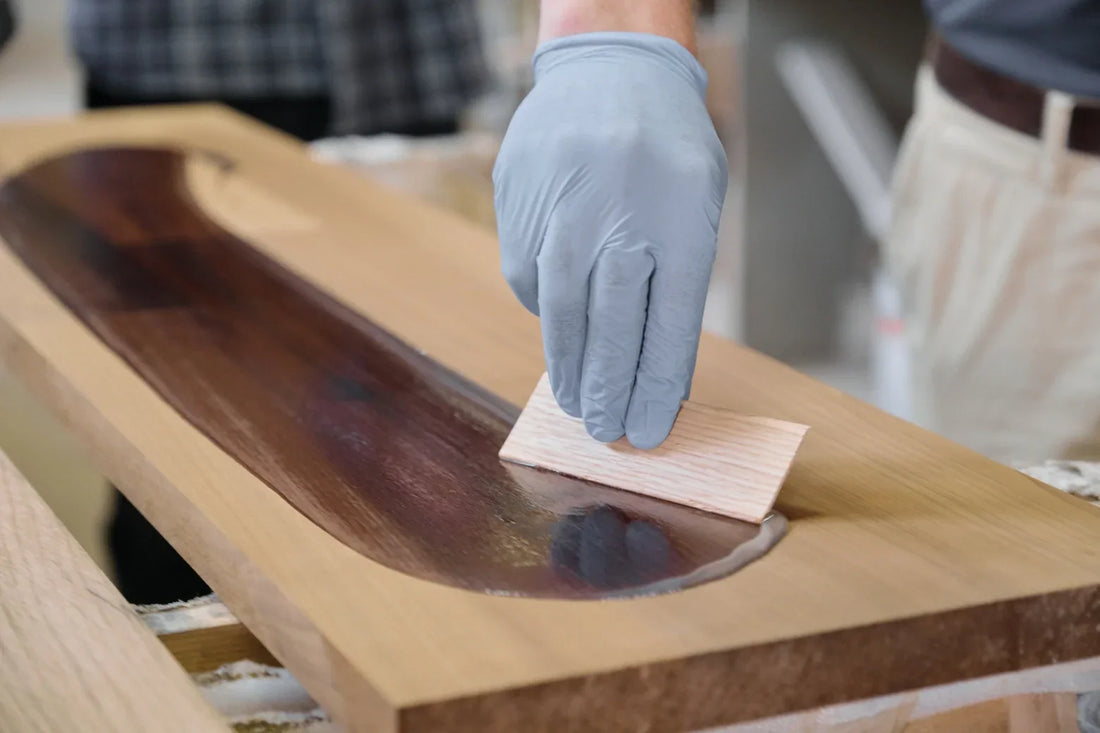
Step 5: Apply New Finish
You can finally bring the wood back to life with a clean and smooth surface. This is where your taste comes in. You can choose the warmth of oil, the glow of shellac, or the durability of satin varnish. There is no single “right” answer here; you just get to choose the one that feels right for the piece in your hands.
Apply thin, even coats using a soft brush or lint-free cloth, letting each layer dry completely before moving on. And take your time to watch the wood soak in.
Step 6: Final Touches and Maintenance
Once the finish has set, give the piece a final polish. A bit of paste wax or furniture polish adds a subtle sheen and creates a protective layer.
From here, it is all about light, consistent care. Dust it gently. Keep it away from direct sunlight and damp corners. With just a little maintenance, your refinished antique will hold its charm for years. After all, you have brought a memory back to life.
Also Read: Vintage-Inspired Furniture: Timeless Charm for Your Home
Refinishing antique wood furniture preserves what makes it irreplaceable. With each step done thoughtfully, from stripping to the final polish, you reveal the warmth and character that only time can give.
At House of Chippendale, we believe in carrying that legacy forward. Our finely crafted handmade mahogany furniture and home accessories are designed with the same reverence for quality and timeless beauty.
If you are ready to welcome a touch of enduring elegance into your home, we invite you to explore our collection. Or, book your private consultation and let our artisans help you find a piece that tells your story.


